Wednesday, July 31, 2013

Bearskin Buddies

Bearskin Buddies

Just a quick reminder that today is the LAST DAY of July... 

So if you're participating in the Bearskin Rug Challenge, you need to post your finished photos today.

Meanwhile, I had a craft meet at my place today - and Daphne brought over her black bearskin rug.

Couldn't resist popping the two of them into a photo together...

Don't they look adorable? And so, so cuddly?

Tuesday, July 30, 2013

An Owl Hat

Owl Hat

Oops.

You knew that I couldn't keep away from the owls for long, didn't you?

But this time it's not a stuffed toy. Instead I've succumbed to the lure of the OWL HAT.

Owl Hat


Yes, I know they've been done to death by everyone else...

But I'm still pretty chuffed with my Scrappy Version!

Owl Hat


Monday, July 29, 2013

No Owls Today...

Thought you might like to see a NON owl post today...

Granny Square Headband

So here's a headband I've been working on recently:

Granny Square Headband

As you can see - it's just a bunch of Granny Squares joined together... So easy!

Granny Square Headband

The pom poms are joined to a chain stitch cord,
which is tied in between two of the Granny Squares.

That way you can wear them on a crazy day,
but take them off if you're feeling a little more subdued...

Granny Square Headband

Friday, July 26, 2013

Uh-Oh...


Owls

The small owls are breeding!

Owls

Owls

And there's some medium sized ones...

Owls

Owls

And some large ones too!

Owls

Owls

But my absolute favourite is the miniature one...

Owls

And here's a shot of the whole family:

Owls

Thursday, July 25, 2013

More Owls...

 Quirky Owl

I did say I was KOOKY for owls right now, didn't I?

Quirky Owl

And you did believe me, right?
 
Quirky Owl

It's possible that OBSESSED would be a better description...

Quirky Owl

But life would be boring without the occasional obsession...

Quirky Owl

Wouldn't it?

Quirky Owl


Wednesday, July 24, 2013

Kooky for Owls...

Quirky Owl

I have to warn you...

I've gone a little bit KOOKY for OWLS!

The rest of the world seems to have been "Owl Crazy" for several years now...

And I've refused to get on the bandwagon.

Not because I don't like owls. Quite the opposite. In fact I love them.

But I like to do my own thing, not just follow the trends of others.

Only then I made an owl... and another... and another...

There are at least 12 owls currently scattered around my desk - in various stages of completion...

And I'm sitting here mentally choosing the yarns for my next one!

Obsessed much???

Quirky Owl

Tuesday, July 23, 2013

Quirky Lion

Lion

So he's not your traditional Lion... but by golly I love him!

Here he is enjoying the jungle that is my back yard...

Lion

Monday, July 22, 2013

Almost done...

I've been working on that Quirky Lion... and he is moments away from being finished...

First I added some button eyes:

Lion

Then some nostrils and a raggedy mane:

Lion

And of course a tail:

 Lion

But there was something that I just WASN'T loving about him...

 It took me some time, but eventually I figured that the problem is the face...

The detail of the face is kind of getting lost in amongst the mane - so I needed something to make it POP some more, and figured the face would look better against a plain light coloured background.

Lion

I love this effect...

Work in slip stitch through the back loops only, using a contrasting colour:

Lion

And see how clever it looks when you turn it over:

Lion

Now to add the eyes and nostrils...

Lion

And stitch the new face to the lion...

Lion

I'll try and get some finished photos to share tomorrow!


Monday, July 15, 2013

Repairs to the Paper Mache Mannequin...

Paper Mache Mannequin

I'm a bit hopeless when it comes to FINISHING things...

Surely I'm not the only one, right?

It's just that other projects come along, with new inspiration - and I can't help but go chasing them.

This paper mache mannequin was started back in April 2012... but never actually finished.

There was always supposed to be more layers of paper, including a top layer of torn sheet music,,, and then a few coats of clear lacquer.

But I barely got one layer on.

In fact, if you look at the lower section of the body - you can see that I used giant pieces of paper, just to get that first layer finished quickly!

That was pretty lazy - even for me...

Paper Mache Mannequin

So I shouldn't really be surprised that the neck broke a few month ago, while I was trying to block a hat on it (and pushing WAY too hard, might I add).

Paper Mache Mannequin

The other day, we received our copy of the local White Pages... which usually goes straight from the front doorstep to the Recycle Bin. I honestly don't know why they print so many copies of these any more. Sure, some people still use them - but I would think most people look business numbers up online these days - or refer to the individual business websites...

Paper Mache Mannequin

This year I'm putting my copy to good use.

Paper Mache Mannequin

I love the way the tiny print is looking. It still has that recycled feel, but doesn't distract in the way that the newsprint does...

So while it's a nice sunny day, I'm outside adding layers of paper mache - in the hope that I actually finish this off properly by the end of the week!


Thursday, July 11, 2013

What could it be?

Lion

Sometimes it's fun to just grab some yarn and a hook - with no real plan in mind - and just see where it all takes you to...

With this one, I had an owl in mind.

I was kind of going for a tweedy, multicoloured look... using three strands of yarn worked together as one, and then swapping and changing colours as each yarn ran out.

Lion

Then it got a bit too tall for an owl... and I realised that it actually wanted to be a cat. A tall sitting cat, with a ginormous long tail which spirals around and around the body.

But then it morphed again...

And for a moment I thought it was destined to become a vase!

A wonderful scrappy vase. 
I can just see this with the most delightful Bunch of Daisies sticking out the top, can't you??
Or maybe Daffodils instead?

(Don't worry about the water leaking out - I'd set a glass jar inside the crochet vase)
Lion
And then I saw that it was actually meant to be a lion...
Don't worry if you can't see it yet - you will!


Monday, July 8, 2013

Crochet Tea Towel Topper

I wrote this Tutorial about 18 months ago - and shared it in another online forum, but forgot to post it here on my blog...

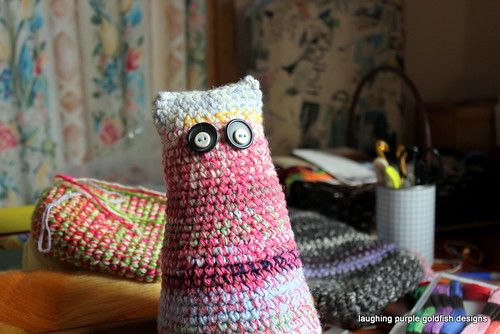
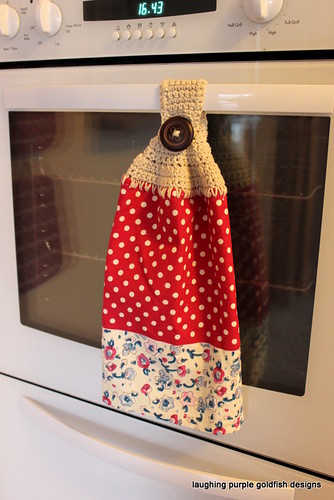
Here's my instructions for making an old Kitchen Classic.... the Crochet Tea Towel Topper...


Basic crochet skills are required. You will need to be able to work chain stitch, single crochet and decrease.

I am using US terminology for my crochet stitches.

(If you use UK terminology, replace all 'single crochet' stitches in this tutorial with 'double crochet' stitches)

Materials:
  • tea towel
  • 8 ply cotton yarn
  • scissors
  • 4mm crochet hook
  • large button
  • wool needle
  • sewing needle and thread (or sewing machine)


Prepare the towel.
Start by cutting your tea towel in half. Turn over the raw edge to create a neat hem. Press and stitch in place.
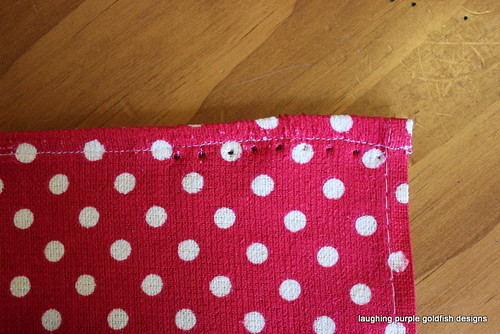


Make guide holes.
Use the wool needle to pierce a row of guide holes through the single layer of fabric beneath the hem.
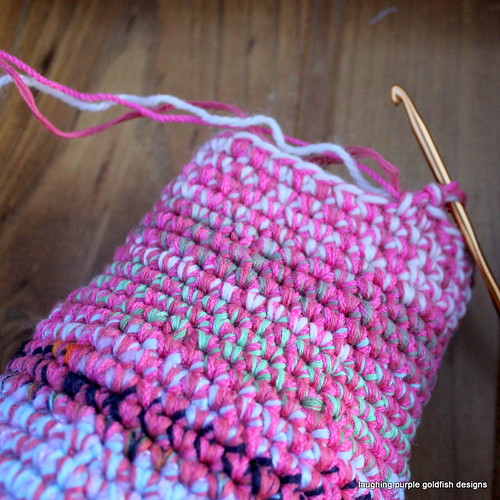
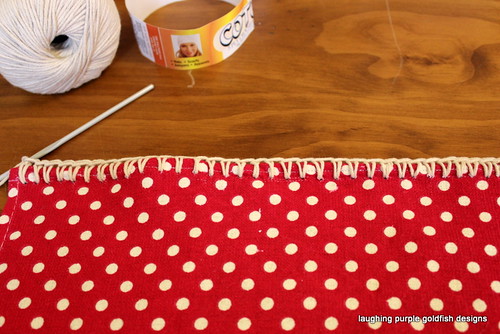


Begin crochet.

I'm going to write my stitch numbers at the end of each row. These are a guide only. Your stitch count will be similar but not necessarily identical.

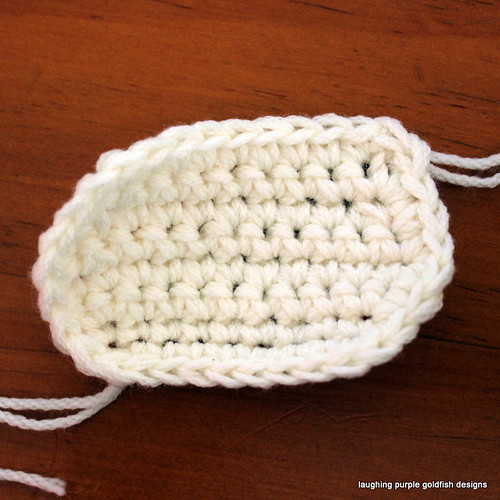
Row 1 : Work a row of single crochet into the guide holes and over the hem - 48 sc.


Rows 2 - 4 : turn your work, chain 1, single crochet across - 48 sc.
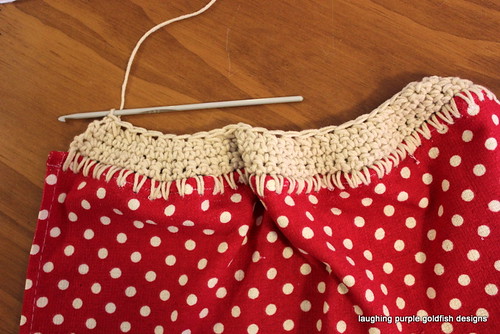


Row 5 : turn your work, chain 1, decrease in every stitch across - 24 sc.


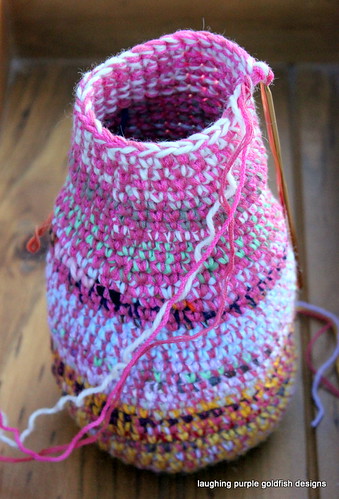
Rows 6 - 8 :
turn your work, chain 1, single crochet across - 24 sc.


Row 9 : turn your work, chain 1, decrease in every stitch across - 12 sc.

Rows 10 - 12 : turn your work, chain 1, single crochet across - 12 sc.


Row 13 : turn your work, chain 1, decrease in every stitch across - 6 sc.

Rows 14 - 26 : turn your work, chain 1, single crochet across - 6 sc.


Make Buttonhole.
Row 27 : turn your work, chain 1, single crochet in first stitch, chain 10, single crochet in last stitch, fasten off.
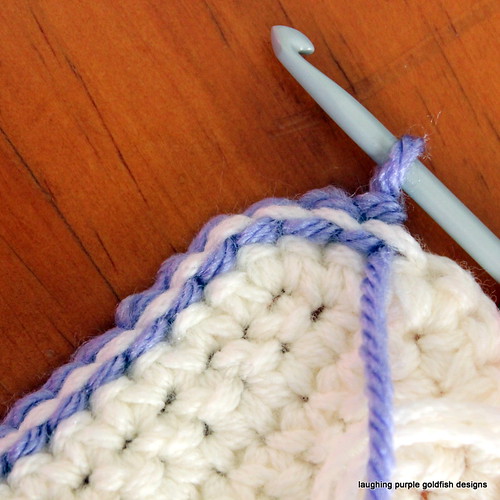


Work edging.
Go back to you original starting point.


Join in the yarn, and work a row of single crochet around the edges of your work.


When you reach the buttonhole, work a single crochet into each of the chain stitches.Then continue with your edging.
Fasten off and weave in all ends.


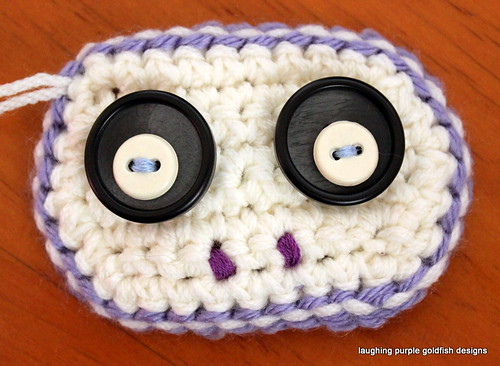
Attach your button... and hang your towel with PRIDE!