Thursday, January 31, 2008

little miss vintage

little miss vintage (lining)

this bag was based on little miss two with a few modifications

I used a 4mm hook and DK weight cotton for the body of the bag

then there were some simple variations in the finishing

I used a fine hook and cotton, for a slightly different picot edge... and went with a simple running stitch trim for the strap... and omitted the flower

the rose lining is my favourite part... fortunately I had just enough scrap fabric to finish the bag, and it complements the style and colouring of the bag beautifully

when paired with the vintage reds hat... they make the most adorable set

little miss vintage vintage ruffles

Wednesday, January 30, 2008

chi-kore

2008_0130sandie0001

meet my friend chi-kore...

at the moment he is looking a little two dimensional, but not for long!

he's my challenge for the swap over at uncommon crochet on ravelry...

Sandie has lovingly sketched him... and I am going to have so much fun bringing him to life

I can't wait to work my magic on him,

although first I need to finish the little vintage bag I was talking about yesterday...

and also my herringbone bag mkII...

then the fun begins

Tuesday, January 29, 2008

vintage reds

decided to re-test my adorable ruffles pattern... with a few variations

vintage ruffles

this time I plied together the reclaimed cotton from a deep pink cardigan and a burgundy jumper... they blended into this gorgeous vintage red mix, which I used for the main part of the hat

to continue with the 'vintage theme' I added a simple picot edging... sc, (sc,dc,sc) in next stitch... repeated to end

I made a slightly different flower for the front this time... five petals, of course... don't know why it is? but I have a thing for five petals!!!

in the photo, the hat looks a little 'square' on top... my model today was uncooperative, so I had to improvise and put the hat on my lampshade!

I'm re-working the little miss two bag in vintage colours to match this hat... should be finished tomorrow

Sunday, January 27, 2008

shades of blue - knitted rag bag

I received lots of positive feedback regarding the Cheerful Rag Bag… in fact, the only disappointment seemed to be the fact that it was crocheted! And there are those of you out there who have not ventured into the world of crochet as yet.

So this time around, we have the knitted rag bag… ‘shades of blue’

It is worked in the round using linen stitch, which gives it a little more structure than plain stockingette… though to be honest, not quite as much strength as single crochet.

click here to download pattern

shades of blue


shades of blue (lining) shades of blue (in and out)


shades of blue (closeup)


Friday, January 25, 2008

uncommon crochet

I'm participating in an unusual swap with the uncommon crochet group over at Ravelry.

We are to create a creature of bizarrity!

The idea is that we each submit some sketches... which will be passed onto our partner... who will crochet the creature (or their interpretation of it) and send it back to us. There's not many of us participating... maybe only six or seven... but I'm really excited about it.

Sketch submissions were due today, and I found it much harder than I expected. Usually I just make things up as I go along... so it was quite difficult to put ideas onto paper. Plus my sketching skills are pretty limited!

Here are my contributions...
creatures

They all have luscious lips, multiple eyes and colourful hairy bits! I think we can safely call them creatures of bizarrity...

I'm excited to see what my partner creates!

Thursday, January 24, 2008

twisted cords

I love twisted cords... they are incredibly easy to make and have unlimited uses

make a thick cord to use as the strap on a knitted handbag, or a thinner one as the tail for a knitted toy... and that's just for starters!

and they are so much faster to work up than what an i-cord is

you will need to precut some lengths of yarn... approx three times the length you would like the finished product to be

the number of lengths you use will depend on the desired thickness... have a play around and see what you prefer

make a practice cord

cut 3 pieces of yarn, each one about 30cm in length

after you have cut the yarn... put the scissors in your pocket... you will need to keep them close by

2008_0124twisted20002
1. anchor the yarn to something solid, eg. door handle, clothes horse, basket handle, or a willing assistant might hold it for you!

2008_0124twisted20003
2. begin twisting the yarn together... I like to just use my fingers, but of course there are options... some folk like to tie a pencil at the end of the yarn to use as a twisting handle... I have also heard of people attaching the end to an electric mixer (set to fast) or a drill (set to slow)

2008_0124twisted20004
3. continue twisting... see how the 'twist' is getting tighter?

2008_0124twisted20005
4. release some of the tension... does it curl all over the place like this? if so, you have twisted enough... pull firmly to straighten the cord out again

2008_0124twisted20007
5. fold carefully in the middle and allow the two halves to twist together... do not let go yet!

2008_0124twisted20012
6. cut at the anchor point, and tie in a knot to prevent unravelling

2008_0124twisted20014
if using as a tail, keep the looped end to attach to the toy

otherwise, knot the top so that both ends look the same

Wednesday, January 23, 2008

accidental hat

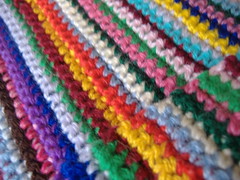
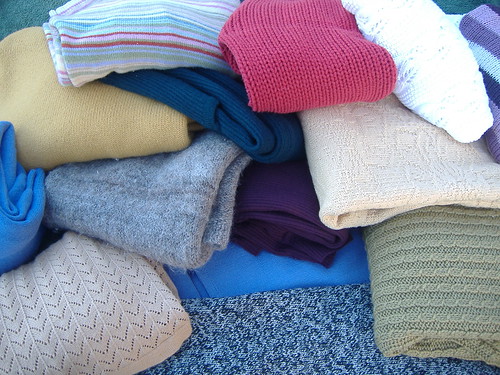
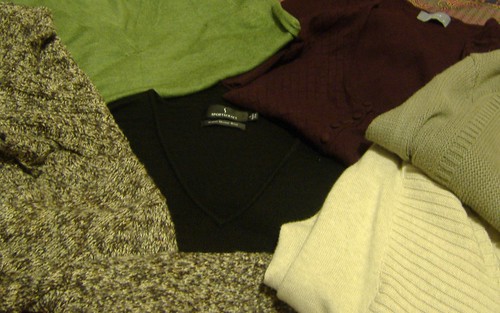
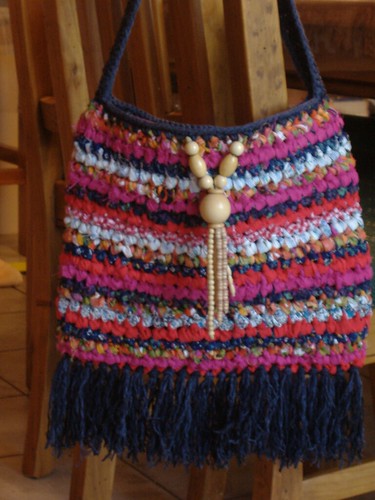
I've been working on a project to use up all those little bits and bobs of yarn I have lying around. Not the half balls, but all those really tiny lengths that I couldn't quite bring myself to throw out... I had quite a collection!

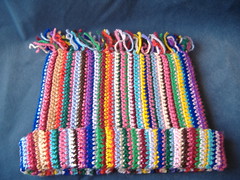
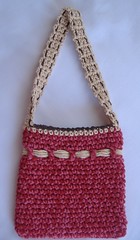
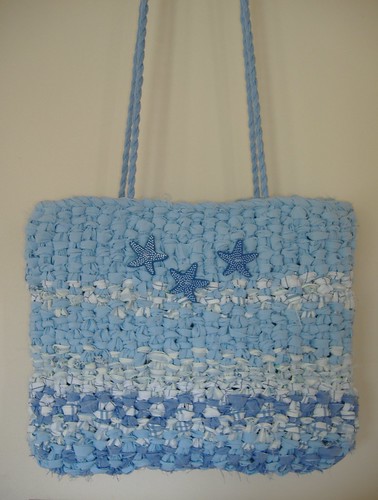
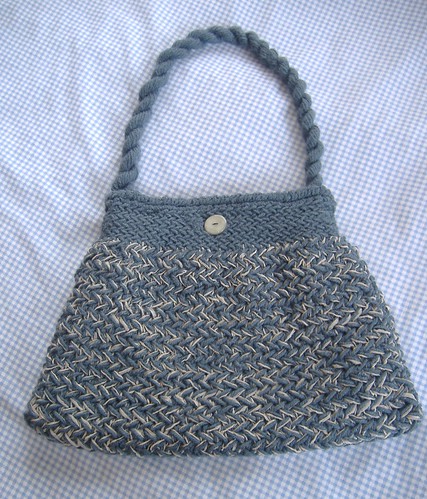
I am in the 'bag zone' at the moment and my daughter has been begging me to make her something. So I decided to go with a random striped bag using all those leftovers.

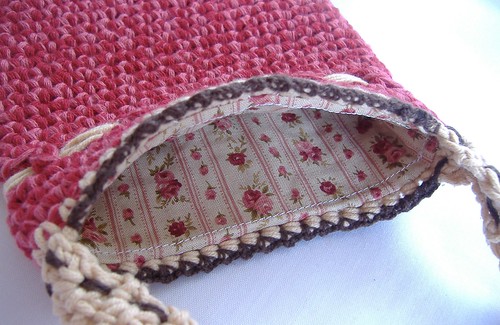
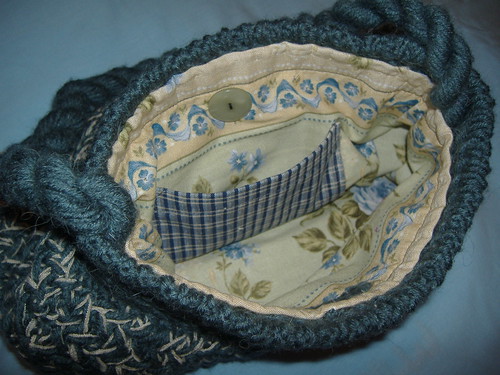
Yesterday I was sewing up the bag, when my daughter came over to see what I was up to...

"Is that for me?" she asked

"Yes"

"Can I have a look?"

"Sure"

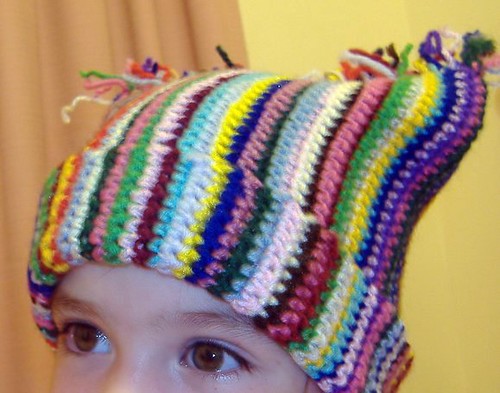
She picked up the bag, put it on her head and said

"Oh, I love my new snow hat mummy!"

I tried to explain to her that it was actually going to be a bag...

"Don't be a silly mummy" she laughed

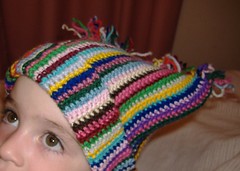
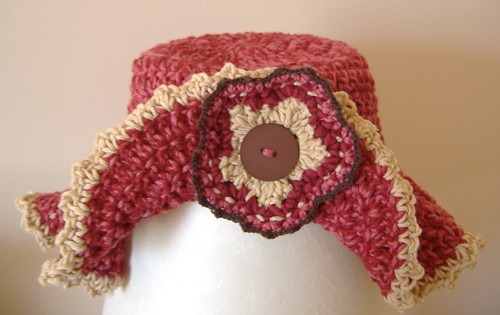
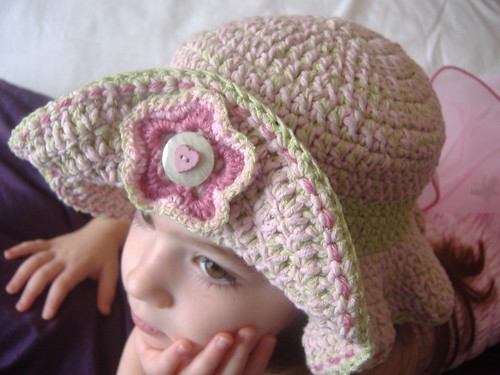
So a hat it is... an accidental hat... but she loves it, and it fits, and you can't ask for much more than that!

2008_0123accidentalhat0020


here's the pattern (if you can call it that)
(fits 2/3 year old)
yarns required
- whatever you have on hand!
- I have used lots if scraps for this one, mostly wool
also
- 3.0 mm crochet hook
- wool needle

let’s begin
ch 41 (the length of this chain will be the height of the hat, including a foldover for the brim… adjust number of chain if desired)
row 1 – sc into 2nd chain from hook, sc to end (40)
fasten off yarn
turn work and join on new colour
row 2 – ch 1, sc in every stitch to end (40)
fasten off yarn
turn work and join on new colour
continue working rows of random colours until work measures circumference of head plus 2 cm
(you might like to refer to the standard head size chart here)
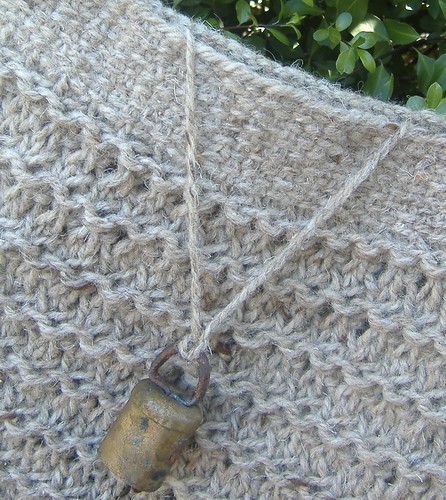
seam to join the starting and finishing rows
lay hat flat, with the seam in the desired position ( I prefer centre back)
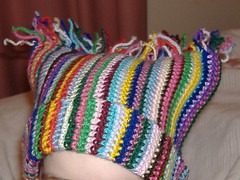
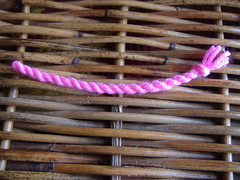
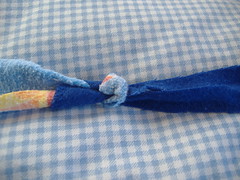
tie together the ends at the top of the hat… this creates the tassel and joins the top at the same time
trim tassels to 3cm
fold over brim
sew in all remaining ends

2008_0123accidentalhat0053 2008_0123accidentalhat0041 2008_0123accidentalhat0046 2008_0123accidentalhat0054

Monday, January 21, 2008

little miss two

miniswap bag


Gorgeous simple handbag, measures 12 x 12cm… quick and easy project

click here to download pattern

miniswap bag closeup


Sunday, January 20, 2008

crochet flower bag

I recently received a donation of knitting books from my mum. She declared that she no longer had any use for them, which I found kind of sad. I just can't imagine ever reaching a point in my life where I say... no more knitting for me.

The box of books is really a box of memories for me. Full of those patterns I gazed upon as a child learning to knit. Memories of clothing I actually wore. Clothing I longed to make.

Most of them aren't even pattern books really. They are pull-out sections from womens magazines... from the early 70s. So much of the magazine was devoted to home crafts in those days.

I love looking through those pages. Not so much looking for a pattern to use, but more for inspiration and ideas.

Anyway, I recently came across an afghan made of beautiful flower motifs. I decided to use the motif as the centrepiece for this cotton bag. It's just a basic shopping bag... a bit fancier than the usual string variety, but just as stretchy! I made it for a swap I am participating in.

Of course I have used reclaimed cotton... is there any other kind?

lace swap bag

My swap partner has a little girl, and I know how much little girls love handbags. So tonight I will sit down with some leftover cotton and see what I can whip up for her. Then tomorrow I can head to the post office... well before the swap deadline! yay


Saturday, January 19, 2008

herringbone bag

in the interest of actually finishing projects... here is my completed herringbone bag

2008_0119herringbonemore0002

It has been off the needles for a few weeks now, but I was having trouble finding the motivation to sew and line it. At last it is done. I'm not feeling much love for it at the moment... I'm actually a bit sick of the sight of it. It's not that I don't like the bag. I do. I'm just over it for the moment.

The herringbone bag is my own design. I will write up the pattern for it at some stage. Later... I feel too bleargh about it at the moment!

Next time I would make the band a little longer. On this one I had to crochet a rope edge around the top to add some 'bulk' to the band. I have lined this one. It is too smooshy and not supportive enough without a lining. I actually put some strengthening into the band lining, so it would hold the desired shape. As always, I made the internal pocket in a different fabric. Oh, and the button needed a shank attachment.

2008_0118herringbone0012

Thursday, January 17, 2008

second sails

Found a fabulous little op shop during my family holiday at Apollo Bay... called Second Sails. Of course, I couldn't help but 'pop' in just for a little look see. There were bargains galore! So I convinced myself that it was okay to buy just a few more jumpers to unravel... and my enabling husband was happy to carry the bags for me! I love that man!!

2008_0115bagragsails0037

I scored 14 garments... for the grand total of $30

Some I will felt, and the others I will unravel... either way, it will keep me busy for a little while.

Then my sister brought me a couple of bags of goodies. Stuff she was taking to the op shop, but she's a good sister and lets me sort through the items first. Lots of sheets and other assorted items which will be turned into fab-yarn. And six more jumpers!!! What a treasure my sister is. I love her too!

2008_0116fabyarn0020

Handling yarn relaxes me, calms me... and really settles my nerves. It doesn't seem to matter whether I am constructing or de-constructing... it all has the same effect on me.

Yes, I'm obsessed... but it's a fairly cheap hobby, and it keeps me out of trouble!

Wednesday, January 16, 2008

fab-yarn... making fabric into yarn

ever wondered what to do with all of those fabric remnants you have stashed in the back of the cupboard? or your old sheets? pillowcases? nappies???

make them into fab-yarn, which can then be knit or crocheted any way you please... let your imagination guide you!

I finished my cheerful rag bag yesterday, and I adore it... think I'll work on a basket next

Here are some very simple instructions to help get you started making fab-yarn

or click here to discover a no-join method of cutting... ingenious!


1. firstly you will need to cut or tear your fabric into strips which are approximately an inch wide

(actually, after much experimenting I have found that I prefer my strips half an inch wide... and generally use an 8.0mm crochet hook)


2008_0116fabyarn0026

2. fold the end of the strip over
2008_0116fabyarn0028

3. make an incision, taking care not to get too close to the end of the strip
2008_0116fabyarn0032

4. now make an incision at the other end of each strip
2008_0116fabyarn0034

5. thread one strip through the other
2008_0116fabyarn0035

6. then bring the 'tail' of that strip through its own 'eye'
is this making any sense yet?
2008_0116fabyarn0037

7. slowly pull the strips in opposite directions
2008_0116fabyarn0038

8. continue to tighten, forming the join
2008_0116fabyarn0039

despite the fact that this 'join' looks bulky in the photos... it is fairly smooth to work through, and doesn't add any bulk to the finished product


Tuesday, January 15, 2008

Friday, January 4, 2008

mary mary

another day... another project finished!

I really should finish things more often, it's a fabulous feeling

this one is a gardener's bag knitted in jute... I will fill it with goodies for my mother-in-law's birthday

2008_0104may0027


This fabulous bag is designed with the home garden enthusiast in mind. It has a lengthy strap which allows it to be worn comfortably across the body, or can be tied wherever you are working in the garden.

Stash your gardening bits and bobs inside… secateurs, garden ties, gloves… whatever you fancy! Hang it up in the garden shed, or on a hook in the laundry… and you will be ready to hit the garden when Spring rolls around!

Or use it for collecting fruit… we have just had the most abundant yield of apricots here, and the plums are nearly ready!

click here to download pattern

closeupbell

2008_0104inbag0009

Thursday, January 3, 2008

adorable ruffles

2008_0103eee0030

Adorable sun hat designed to fit a 2 - 3 year old

download now


closeuphat

Wednesday, January 2, 2008

a time of planning

Happy New Year to all!

I'm not much of a one for making New Year's Resolutions. There never seemed to be much point. Traditionally they are all broken by the end of January anyway!

But I do have plans for this year... mostly regarding my craft.

#1. 'finish what you start'

Anyone who knows me well will be rolling around on the floor in hysterics at this suggestion! I am notoriously bad when it comes to finishing anything... fabulous at starting projects, but not so good on the follow through! So let's take it easy and just start with January. A time for finishing. I have 10 WIPs on my ravelry project page in various stages of completion. They will be finished by the end of this month. I will also reclaim yarn from four jumpers. Plus I have a pair of sock club socks to knit and a woolaholics lace swap item to make. Nothing new is cast on until ALL of those projects are completed!

#2. focus on reclaimed and recycled materials

Having learned to appreciate the art of reclaiming yarns... I love it! So it's my focus from here on in to use them wherever possible.

#3. share my patterns with the world

Why not? I have certainly appreciated finding so many free online patterns, so it's time to 'pass it on' and share some of my own. Knit and crochet.

So... that's for starters! Time to get busy.